
オープンソースのISAとして注目を集め始めているRISC-V、ハードでLinuxのような革命が起こせるのかと期待されています。
RISC-Vはオープンソースでコードも公開されているため、誰でもFPGAにRISC-Vコアをビルドして動作させることができます。
前回、開発環境を構築してXilinx Artix FPGAを搭載したDigilentのArty A7ボード用にFPGAデータをSPI Flashに書き込みました。
電源を入れるとFlashに格納したFPGAデータがFPGAに書き込まれ、RISC-Vコアが起動します。

今回は、RISC-Vコアにサンプルプログラムを書き込みます。
たいと思います。
準備
環境構築前の準備
必要なもの
Digilent Arty A7
Xilinx Artix A7を搭載したDigilentの開発ボードです。

Olimex
ARM-USB-TINY-H JTAGアダプタです。デバッグで必要となります。
ジャンパケーブル
Arty A7とOlimexを接続するために使用します。
端の茶色から使用すると、色が合うため配線の時に楽です。

ケーブルの作成や実機との接続方法は、前回の記事を見てください。
Freedom-e-sdkを使ったソフト開発
RISC-Vのソフト開発には、Freedom-e-sdkというソフトウェア開発キットが用意されています。
Freedom-e-sdkを使用したソフト書き込み方法をここでは解説します。
Freedom E SDKの取得
テストプログラム・デバッグ環境・コンパイラなどが入ったソフトウェア開発キットです。
Gitでクローンしてきます。
cd /home/user/riscv
git clone --recursive https://github.com/sifive/freedom-e-sdk.git
環境変数の設定
ソフトウェアをビルドするために環境変数を設定します。
.bashrcに記載しておくことで次回起動時も変数が保存されます
cd /home/user
nano .bashrc

# Add for building software on freedom -->
export RISCV_PATH=/home/user/riscv/tool/riscv64-unknown-elf-gcc-8.1.0-2019.01.0-x86_64-linux-ubuntu14
export RISCV_OPENOCD_PATH=/home/user/riscv/tool/riscv-openocd-0.10.0-2018.12.0-x86_64-linux-ubuntu14
# Add for building software on freedom -->
source .bashrc
ソフトウェアのビルド
FREEDOM E SDKを取得したディレクトリに移動して、makeコマンドを実行します。
softwareコマンドでビルドし、uploadで実機に転送しています。
sudo cd /home/user/riscv/freedom-e-sdk
make BSP=metal PROGRAM=hello TARGET=freedom-e310-arty clean
make BSP=metal PROGRAM=hello TARGET=freedom-e310-arty software
make BSP=metal PROGRAM=hello TARGET=freedom-e310-arty upload
以下は成功した時のコマンド実行ログです。
user@user:~/riscv/freedom-e-sdk$ make BSP=metal PROGRAM=hello TARGET=freedom-e310-arty upload
scripts/upload --elf /home/user/riscv/freedom-e-sdk/software/hello/debug/hello.elf --openocd /home/user/riscv/tool/riscv-openocd-0.10.0-2018.12.0-x86_64-linux-ubuntu14/bin/openocd --gdb /home/user/riscv/tool/riscv64-unknown-elf-gcc-8.1.0-2019.01.0-x86_64-linux-ubuntu14/bin/riscv64-unknown-elf-gdb --openocd-config bsp/freedom-e310-arty/openocd.cfg
Open On-Chip Debugger 0.10.0+dev-gcd32bd4 (2018-12-19-01:15)
Licensed under GNU GPL v2
For bug reports, read
	http://openocd.org/doc/doxygen/bugs.html
adapter speed: 10000 kHz
Info : auto-selecting first available session transport "jtag". To override use 'transport select <transport>'.
Info : ftdi: if you experience problems at higher adapter clocks, try the command "ftdi_tdo_sample_edge falling"
Info : clock speed 10000 kHz
Info : JTAG tap: riscv.cpu tap/device found: 0x20000913 (mfg: 0x489 (SiFive, Inc.), part: 0x0000, ver: 0x2)
Info : datacount=1 progbufsize=16
Info : Disabling abstract command reads from CSRs.
Info : Examined RISC-V core; found 1 harts
Info :  hart 0: XLEN=32, misa=0x40001105
Info : Listening on port 3333 for gdb connections
Info : Found flash device 'sp s25fl128' (ID 0x00182001)
cleared protection for sectors 64 through 255 on flash bank 0
Ready for Remote Connections
Info : Listening on port 6666 for tcl connections
Info : Listening on port 4444 for telnet connections
Info : accepting 'gdb' connection on tcp/3333
metal_shutdown (code=0) at /home/user/riscv/freedom-e-sdk/freedom-metal/src/shutdown.c:19
19	      __asm__ volatile ("nop");
Info : JTAG tap: riscv.cpu tap/device found: 0x20000913 (mfg: 0x489 (SiFive, Inc.), part: 0x0000, ver: 0x2)
JTAG tap: riscv.cpu tap/device found: 0x20000913 (mfg: 0x489 (SiFive, Inc.), part: 0x0000, ver: 0x2)
cleared protection for sectors 64 through 255 on flash bank 0
cleared protection for sectors 64 through 255 on flash bank 0
Info : JTAG tap: riscv.cpu tap/device found: 0x20000913 (mfg: 0x489 (SiFive, Inc.), part: 0x0000, ver: 0x2)
Loading section .init, size 0x178 lma 0x20400000
Loading section .text, size 0x3108 lma 0x20400180
Loading section .rodata, size 0x2c8 lma 0x20403288
Loading section .init_array, size 0x8 lma 0x20403550
Loading section .data, size 0x760 lma 0x20403558
Info : Padding image section 0 at 0x20400178 with 8 bytes
Info : Disabling abstract command writes to CSRs.
Info : JTAG tap: riscv.cpu tap/device found: 0x20000913 (mfg: 0x489 (SiFive, Inc.), part: 0x0000, ver: 0x2)
Start address 0x20400000, load size 15536
Transfer rate: 11 KB/sec, 3107 bytes/write.
shutdown command invoked
shutdown command invoked
A debugging session is active.

	Inferior 1 [Remote target] will be detached.

Quit anyway? (y or n) [answered Y; input not from terminal]
Remote connection closed
プログラムの動作確認
UARTで確認します。
tioがインストールされていない場合はsudo apt install tioでインストールしてください。
user@user:~/riscv/freedom-e-sdk$ tio /dev/ttyUSB1 -b57600
[tio 11:21:44] tio v1.29
[tio 11:21:44] Press ctrl-t q to quit
[tio 11:21:44] Connected
Hello, World!
Freedom Studioを使ったソフト開発
Freedom E SDKは、コマンドベースで作業しなければなりませんので、初心者には少し敷居が高いです。
でも、安心してください。
SiFiveからEclipseベースの統合開発環境であるFreedom Studioが用意されています。
Freedom Studioでソフト開発する方法を解説します。
Freedom Studioの準備
SiFiveのサイトから「Freedom Studio」をダウンロードします。
Ubuntuで動作させているため、Linuxを選択します。
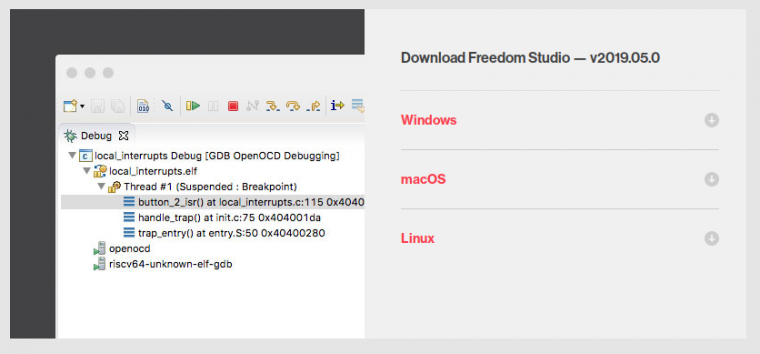
ダウンロード完了後、tar.gzを任意のディレクトリに解凍してください。
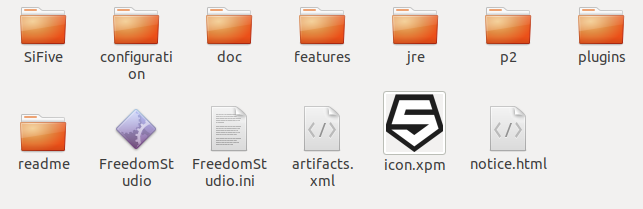
Freedom Studioでの
解凍したディレクトリにあるFreedomStudioを実行してください。
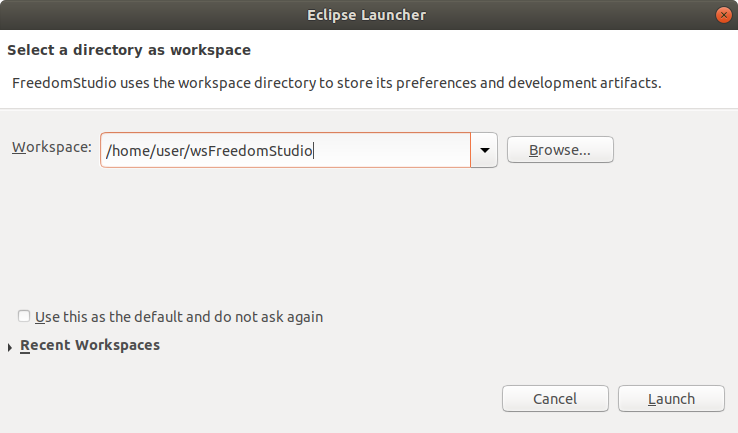
Freedom Studioが起動します。
使い方はEclipseと同じです。
Workspaceの設定はデフォルトで問題ないです。変えたい場合は好きなディレクトリを選択してください。
Welcome画面が出てきます。
ソフトの書き込みは「I want to create a new Freedom E SDK Project」を選択してください。
もし出てこない場合は、Helpの「Let’s Get Started」から表示できます。
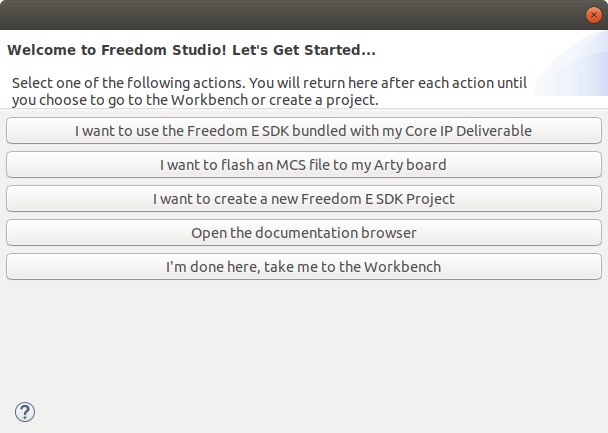
ちなみに、SPI FlashにFPGAデータのmcsファイル書き込みは「I want to flash an MCS file to my Arty board」で行えます。
事前にVivadoのインストールは必要です。
RISC-V FPGA ビルド編の記事を参考にしてください。
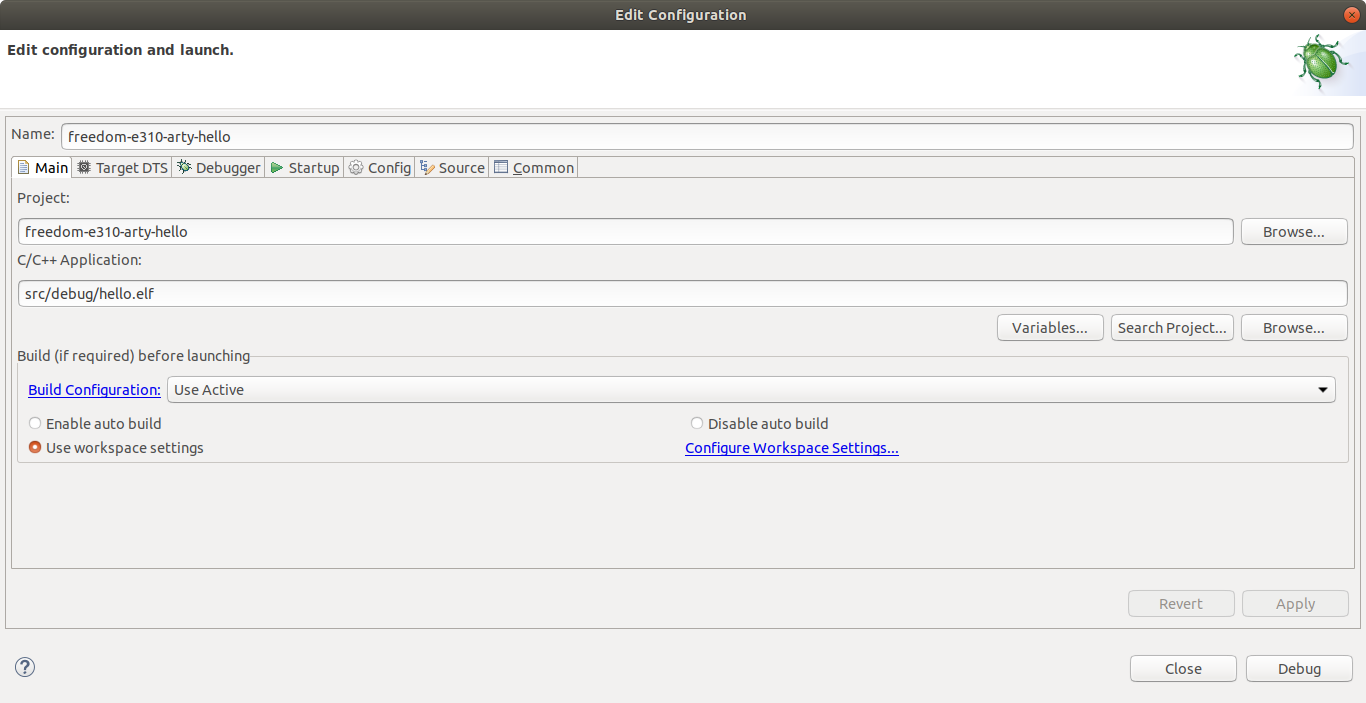
サンプルプロジェクトの作成
サンプルプロジェクトの作成画面が出てきますので、設定します。
今回はUARTで確認するhelloを使用します。
Select Target(開発ボードの選択):freedom-e310-arty
Select Example Program(サンプルプログラムの選択):hello
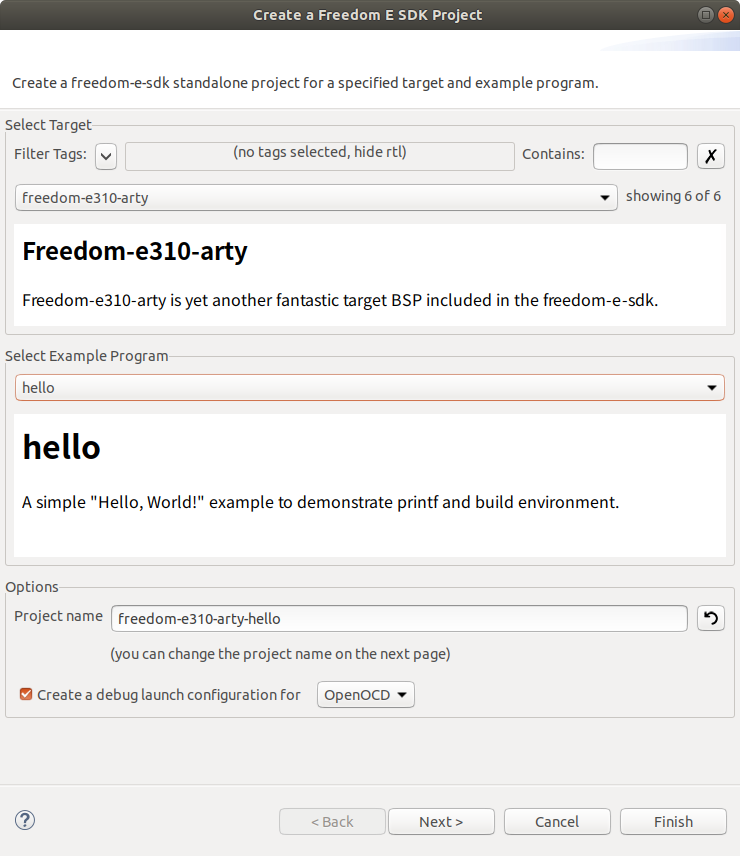
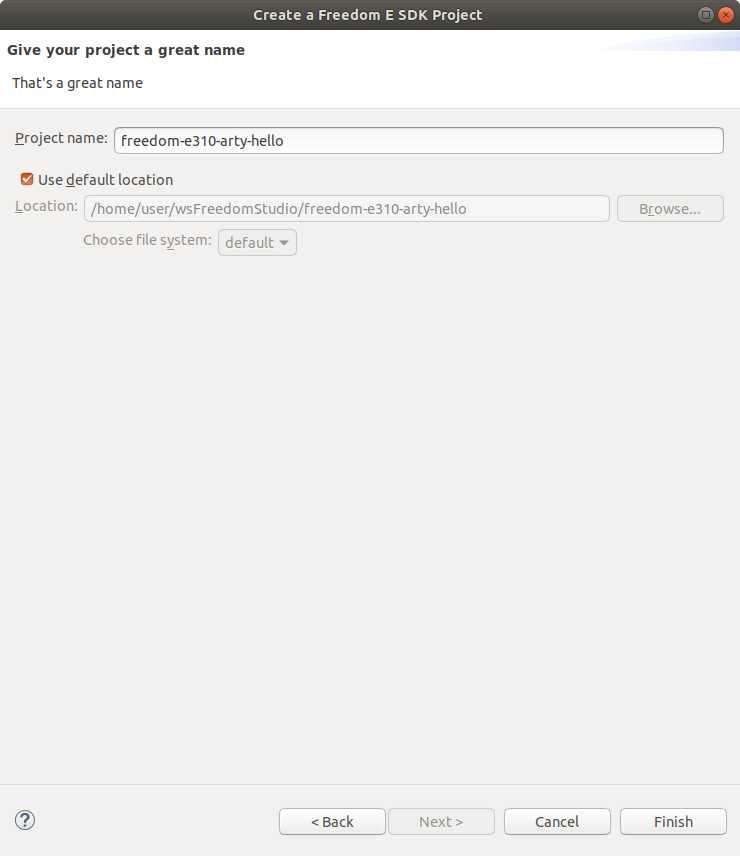
詳細設定はデフォルトのままで問題ありません。Debugをクリックします。
使い方はEclipseと同じです。
ビルドボタンでビルドができます。
デバッグ開始でターゲットボードへプログラムを転送してmain関数でブレークします。
そこからはブレークポイントを設定したり、ステップをしたりといった基本的なデバッグが可能です。
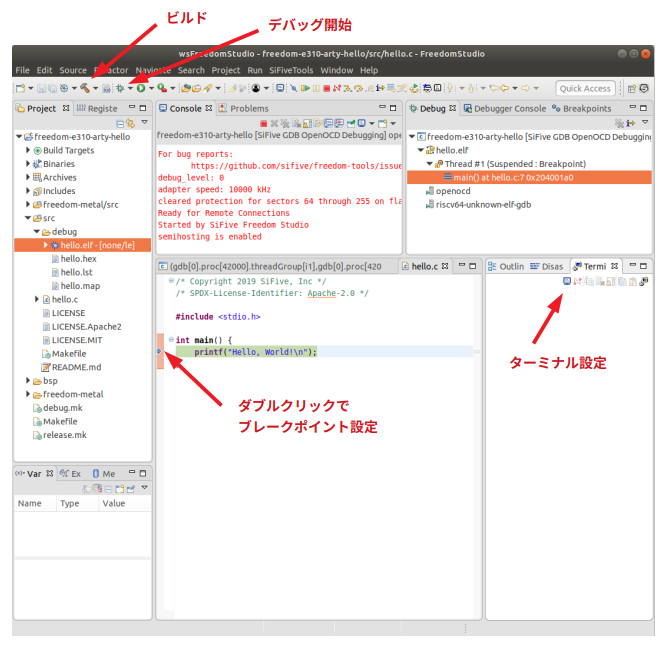
ターミナル設定を
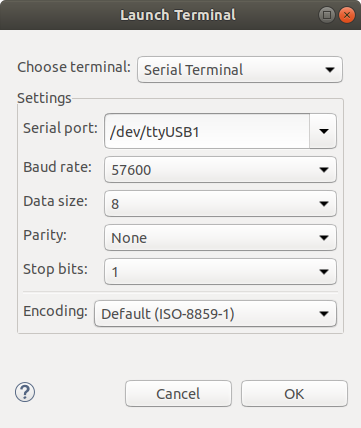
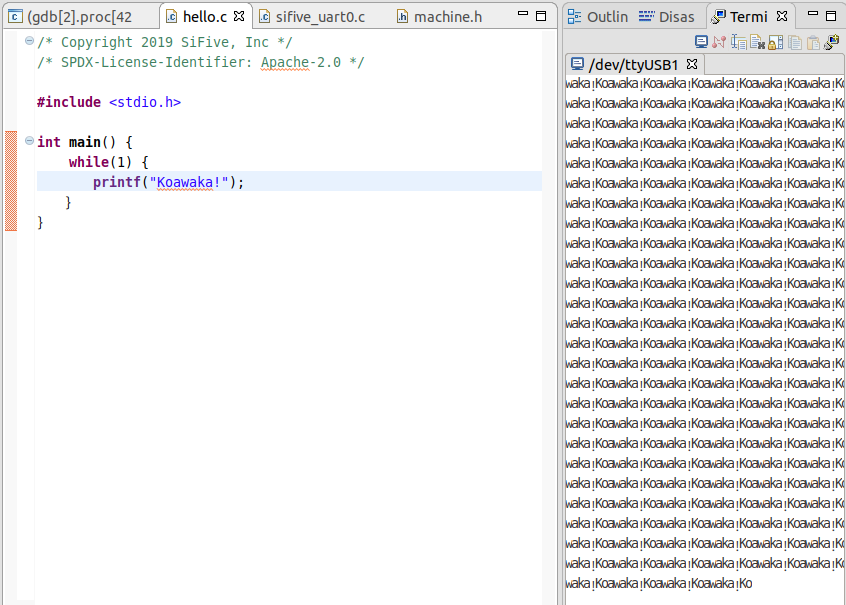
プログラムを一部修正してデバッグ開始。
Resume(F8)で再実行するとターミナルに表示されました。
まとめ
Freedom Studioを用いてRISC-Vの開発ができるようになりました。
GUIでデバッグもできるようになるため、開発効率はコマンドラインよりも向上すると思います。
FPGAでハードを作ってソフトをその上で動かす。ソフトウェアだけで無くハードウェアも学ぶ組み込みの教育プログラムとしてもいい題材だと思います。
この環境でRISC-Vについて、引き続き調査したいと思います。
RISC-Vに興味がある方はこの本を読んでみてください。
著者は、RISC-Vに実際に参画しているCPUアーキテクチャの権威 パターソン先生です。